
Making a Java Application using NetBeans IDE
- Siah Peih Wee

- May 2, 2022
- 1 min read
In this tutorial, you will learn to use NetBeans to develop a Java Application

Setting Up the Development Environment
Download Apache NetBeans IDE
Install and Run
Start New Project
Start a New Project

Choose Java with Ant > Java Application
Press Next

Type in Project Name
Uncheck Create Main Class
Press Finish

Create Your First Java Class
Right Click a Package > New > Java Class
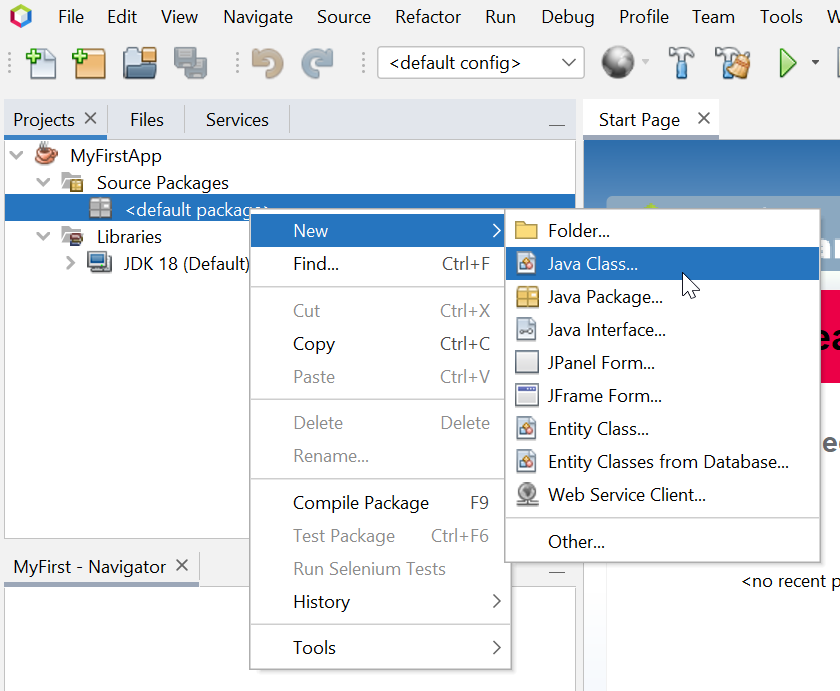
Type in Class Name
Press Finish
Notice there is a warning? This is because classes in other packages cannot access the classes in default package. Therefore, for this practice, we are just going to use one Main Class.

Now you will see the code of the newly created class.

Press Run Project

You will see No Main Classes Found
This is because the class doesn't have a main function
Press Cancel

Add a static function main that take in a Array of Strings as Arguments.
Use the function to print out Hello World!

Right click your Project
Select Properties

In the Properties
Select Run > Browse for Main Class

Now you can see the class you have created
Select it and press Select Main Class

You can now press OK

You can now press OK

You will see print out in the Output panel


Comments