Query Server via Axios
- Siah Peih Wee

- Apr 11, 2022
- 3 min read
Updated: Apr 12, 2022
In this tutorial, you will learn how to write a simple frontend to send query request. You may want to preview the code in my Github.

Prior Reading
This is a continuation from the Create Backend using Postgres + Express tutorial.
If you have not read it, you may wish to read it prior to attempting this tutorial.
Setup Development Environment
Install VS Code
Install Node.js
Install Git
Install Live Server Extension in VS Code

Clone Git from Previous Tutorial
Create a Working Folder
Run Integrated Terminal from that folder.
Clone Git from Previous Example
git clone https://github.com/peihwee/node-postgres-exampleYou may then rename the folder to any name you like.
Run Server
Run Integrated Terminal from folder backend.
Install Modules
npm iStart the server by doing the following in Integrated Terminal
npm startYou should see the following log message in console or terminal
App listening to port 3000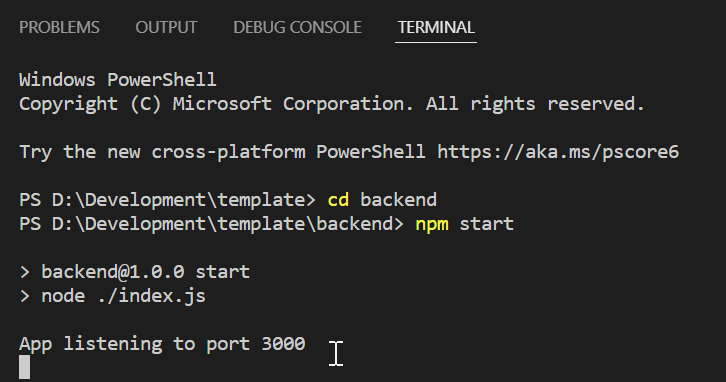
Open Browser > Go to the URL ---> http://localhost:3000
You should see the body of the document showing
Server running on port 3000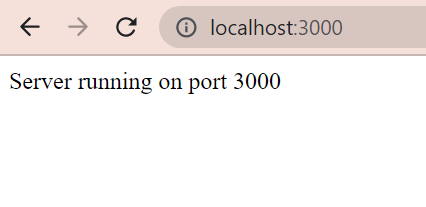
Import Axios
Go to index.html in frontend folder
Import Axios in the HTML
<script src="https://unpkg.com/axios/dist/axios.min.js"></script> Create Javascript file
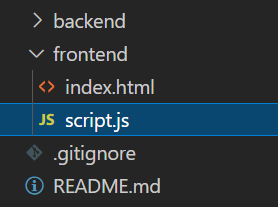
Create a script.js file in the frontend folder
Add the script before the end of body in index.html
<script src="script.js"></script>Add HTML Elements
Add TextArea to display Server Responses.
Add 6 Buttons to
Test GET
Test POST
Create Table
Drop Table
Insert Message
Retrieve All Messages
Your HTML will look like the following
<!doctype html>
<html>
    <head>
        <title>Frontend Example</title>

        <script src="https://unpkg.com/axios/dist/axios.min.js"></script>
    </head>
    <body>
        <div>
            <textarea id="messagesDisplay" name="messagesDisplay" rows="4" cols="50"></textarea>
        </div>
        <div>
            <button id="testGET">Test GET</button>
            <button id="testPOST">Test POST</button>
        </div>
        <div>
            <button id="createTable">Create Table</button>
            <button id="dropTable">Drop Table</button>
        </div>
        <div>
            <input type="text" id="messageToSend" name="messageToSend">
            <button id = "insertMessage">Send</button>
        </div>
        <div>
            <button id = "getMessages">Retrieve</button>
        </div>

        <script src="script.js"></script>
    </body>
</html>
Initalise All HTML Element
In the script.js, start by initializing constants to reference to the HTML elements.
/////////////////////////////////////////////////////////////////////
// Initalize Constant to store DOM Elements
/////////////////////////////////////////////////////////////////////
const butTestGET = document.getElementById("testGET");
const butTestPOST = document.getElementById("testPOST");

const butCreate = document.getElementById("createTable");
const butDrop = document.getElementById("dropTable");
const butInsert = document.getElementById("insertMessage");
const butSelect = document.getElementById("getMessages");
const txtToSend = document.getElementById("messageToSend");
const txtDisplay = document.getElementById("messagesDisplay");
Creating Functions & Adding Events
First create a function and add the onclick event to target that function.
/////////////////////////////////////////////////////////////////////
// Setup onclick Events
/////////////////////////////////////////////////////////////////////
butTestGET.onclick = TestGet;

/////////////////////////////////////////////////////////////////////
// Function to Test GET with Server
/////////////////////////////////////////////////////////////////////
function TestGet()
{

}
Display Response
Create a function to display any data to the txtDisplay
This will be used subsequently when you receive response from server.
/////////////////////////////////////////////////////////////////////
// Function to Display Server Response
/////////////////////////////////////////////////////////////////////
function DisplayResponse(objData)
{
    txtDisplay.innerHTML = "";
    let sData = JSON.stringify(objData);
    txtDisplay.append(sData);
}
Understanding Axios & Promise
You may want to read the official documentation here https://axios-http.com/docs/example
Axios is a Promise based HTTP Client
You can see the example below on
How to use Axios to perform a query GET
How to use Promise's then() and catch()
axios.get('/example', {
    params: {
      ID: 12345
    }
  })
  .then(function (response) {
    console.log(response);
  })
  .catch(function (error) {
    console.log(error);
  })
  .then(function () {
    // always executed
  });
Using Axios for GET
In this part, you will use Axios to do a GET request from http://localhost:3000/api
/////////////////////////////////////////////////////////////////////
// Function to Test GET with Server
/////////////////////////////////////////////////////////////////////
function TestGet()
{
    axios.get('http://localhost:3000/api', { params: { message: "Hello World!" } })
    .then((response) => {
        console.log(response.data); //View in Browser's Developer Tools

        DisplayResponse(response.data);
    })
    .catch(function (error) {
        DisplayResponse(error);
    });
}
Using Axios for POST
In this part, you will use Axios to do a POST request from http://localhost:3000/api
NOTE: POST method does not need params.
/////////////////////////////////////////////////////////////////////
// Function to Test POST with Server
/////////////////////////////////////////////////////////////////////
function TestPost()
{
    axios.post('http://localhost:3000/api/', { message: "Hello Again!" })
    .then((response) => {
        console.log(response.data); //View in Browser's Developer Tools

        DisplayResponse(response.data);
    })
    .catch(function (error) {
        DisplayResponse(error);
    });
}
Make sure to update the Events but the buttons.
/////////////////////////////////////////////////////////////////////
// Setup onclick Events
/////////////////////////////////////////////////////////////////////
butTestGET.onclick = TestGet;
butTestPOST.onclick = TestPost;
Test with Live Server
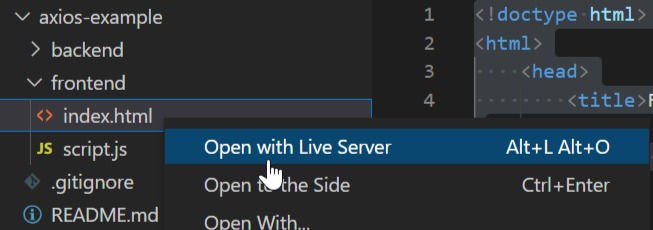
Right click index.html in VS Code
Choose Open with Live Server
Adding the rest of the functions
Now add the other functions to interact with the server's API
You will notice there is a new Axios method axios.delete() introduced here.
/////////////////////////////////////////////////////////////////////
// Function to Create Table
/////////////////////////////////////////////////////////////////////
function CreateTable()
{
    axios.post('http://localhost:3000/api/table', {})
    .then((response) => {
        console.log(response.data); //View in Browser's Developer Tools

        DisplayResponse(response.data);
    })
    .catch(function (error) {
        DisplayResponse(error);
    });
}

/////////////////////////////////////////////////////////////////////
// Function to Drop Table using DELETE
/////////////////////////////////////////////////////////////////////
function DropTable()
{
    axios.delete('http://localhost:3000/api/table', {})
    .then((response) => {
        console.log(response.data); //View in Browser's Developer Tools

        DisplayResponse(response.data);
    })
    .catch(function (error) {
        DisplayResponse(error);
    });
}

/////////////////////////////////////////////////////////////////////
// Function to Insert Row using POST
/////////////////////////////////////////////////////////////////////
function InsertMessage()
{
    axios.post('http://localhost:3000/api/message', { message : txtToSend.value })
    .then((response) => {
        console.log(response.data); //View in Browser's Developer Tools

        DisplayResponse(response.data);
    })
    .catch(function (error) {
        DisplayResponse(error);
    });
}

/////////////////////////////////////////////////////////////////////
// Function to Select Rows using GET
/////////////////////////////////////////////////////////////////////
function GetAllMessages()
{
    axios.get('http://localhost:3000/api/message', {})
    .then((response) => {
        console.log(response.data); //View in Browser's Developer Tools

        DisplayResponse(response.data);
    })
    .catch(function (error) {
        DisplayResponse(error);
    });
}
Make sure to update the Events but the buttons.
/////////////////////////////////////////////////////////////////////
// Setup onclick Events
/////////////////////////////////////////////////////////////////////
butTestGET.onclick = TestGet;
butTestPOST.onclick = TestPost;
butCreate.onclick = CreateTable;
butDrop.onclick = DropTable;
butInsert.onclick = InsertMessage;
butSelect.onclick = GetAllMessages;

Comments